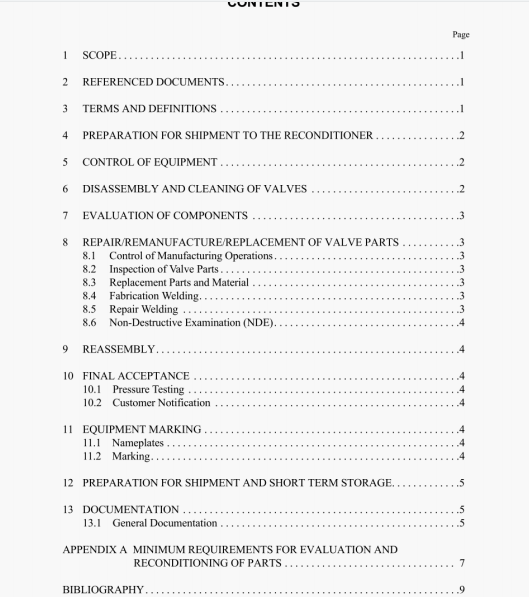
API RP 6DR:2006 pdf download.Repair and Remanufacture of Pipeline Valves.
Body, bonnet, closures, end pieces. tailpiece, and covers shall be visually inspected. NDE may be employed to investigate the extent of visual dcfxts. Injurious defects such as cracks or excessive metal loss shall bc brought to the attention of the owner for disposition instructions (see Section 5).
Localized pitting or areas of localized corrosion that do not significantly affect the pressure retaining capability of the part are generally acceptable. Significant pitting or areas of metal loss corrosion that significantly affects the pressure retaining capability of 11w part shall be brought to the owner’s attention for disposition instructions.
All tapped holes shall be visually inspected for missing or incomplete threads, defective thread profile, torn or ruptured surfaces and cracks. Defects shall be removedrepaired using appropriate methods.
Visually inspect body to bonnclflailpiececover flanges and seal surfaces for corrosion and overall condition. Body to bonnet gasket-sealing surfaces shall be visually inspected for corrosion, wear, cuts, or scoring. Dimensions and finish of the seal surface shall be per documented requirements not less stringent than the OEM or owner’s requirements.
End connector dimensions shall comply with the applicable specification per API Spec 6D, paragraph 6.7. Face-to-face and end- to-end dimensions shall conform to API Spec 6D or to dimensions specified by the owner.
Stem seal preparations or stuffing boxes shall be examined for the proper condition and finish consistent with the seal design. Surface corrosion shall be removed by polishing. machining, or other suitable means. Dimensions and finishes of the reconditioned surface shall be consistent with the particular stem seal design being used and not less stringent than the OEM or owner’s requirements.
A.2 Stems
Stem sealing surfaces shall be smooth and free of defects that may affect the scalability or functionality of the part. The parts shall be free of burrs or other mechanical damage that may affect the strength. function, or fitness of the part for its intended use. The dimension of the sealing area shall be inspected and evaluated with respect to documented requirements that are not less stringent than the OEM or owner’s requirements.
Threaded stems shall be inspected for missing or incomplete threads, defective thread profile, torn or ruptured surfaces and cracks. The surface texture of threaded parts may be evaluated without magnification.
Rising sterns shall be inspected for straightness, finish, and cylindricity. Reconditioning may be by polishing, grinding, machining. welding, mechanical straightening. plating and grinding, or other suitable means.
Stem heads or other connections shall engage properly with the mating component.
A.3 Pressure Controlling Parts (Gate, Ball, Plug, Disc, Seats, Clappers, etc.)
Pressure controlling parts shall be visually inspected for corrosion, wear, pitting. erosive wear, or other injurious defixts. Defective parts shall be repaired. remanufactured. or replaced. Sealing surfaces shall have a profile (flatness. sphericity, etc.) consistent with the documented design requirements.
A.4 Bearings
Thrust Bearings—thrust bearings shall be free of damage. excessive corrosion, or wear. Operation shall be smooth.
Skeve Bearings—Sleeve bearings shall be free of damage, excessive corrosion, or wear. (‘oatings or liners shall not be torn, damaged or excessively worn. Operation must be smooth.
Bearings not meeting the above requirements shall be replaced.
API RP 6DR:2006 pdf download
